

Key Takeaways
- A DIY oil change requires specific tools, the right oil type, and a safe way to elevate the vehicle.
- Consulting your owner's manual for oil specification and drain interval is essential before starting.
- Used motor oil must be disposed of properly — not poured down drains or into trash.
- Some vehicles, including those with complex underbody panels or dealer-only reset requirements, are better left to professionals.
- The process typically takes 45–90 minutes for a first-timer working carefully.
What you will need
What You're Actually Getting Into
An oil change is one of the more approachable DIY maintenance tasks — but approachable doesn't mean simple. Before lifting a wrench, it helps to understand what the job actually involves: draining old oil, swapping the oil filter, and refilling with fresh oil that matches your engine's specifications. Each of those steps carries its own requirements and potential pitfalls.
The first thing to check is your owner's manual. It tells you the correct oil viscosity (such as 5W-30 or 0W-20), the oil capacity in quarts, the filter type, and the manufacturer's recommended change interval. Skipping this step is one of the most common mistakes DIYers make. Not all oils are interchangeable — if you're uncertain about synthetic versus conventional, our guide to synthetic vs. conventional motor oil explains the practical differences.
It's also worth being honest about whether DIY makes sense for your vehicle. Some modern cars have underbody panels that require partial removal to access the drain plug, or oil life monitoring systems that need a dealer scan tool to reset properly. For a balanced look at which tasks are genuinely manageable at home, see our piece on DIY car maintenance vs. garage servicing.
What you will need
Tools and Materials You'll Need
Gathering everything before you start prevents mid-job interruptions and keeps safety risks low. At minimum, you'll need a way to safely raise and support the vehicle, access to the drain plug and filter underneath, and a container to catch the old oil.
Floor jack and jack stands (or drive-up ramps)
Safely elevates the vehicle to give you access to the underside. Never rely on a jack alone to support the car while you work.
Drain pan (at least 8-quart capacity)
Catches the used oil as it drains from the engine.
Oil filter wrench
Provides grip to remove a tight or factory-installed oil filter without damaging it.
Combination wrench or socket set
Removes and reinstalls the drain plug; size varies by vehicle.
Torque wrench
Allows you to tighten the drain plug to the manufacturer's specified torque, preventing over-tightening.
Fresh motor oil (correct type and quantity per your manual)
Replaces the drained oil to lubricate the engine.
Replacement oil filter (OEM-spec or equivalent)
Filters particulates from the new oil; replaced each oil change.
Nitrile gloves and rags
Protects skin from hot oil and helps clean spills during the job.
One item often overlooked: a torque wrench. Over-tightening the drain plug is a leading cause of stripped threads in the oil pan — an expensive repair that a simple tool helps you avoid.
Step-by-Step: The Oil Change Process
Follow these steps in order. If at any point you're unsure what you're looking at under the vehicle, stop and consult a qualified mechanic rather than guessing.
Warm the engine briefly, then shut it off
Run the engine for two to three minutes. Slightly warm oil flows out more completely than cold oil, making the drain faster and more thorough. Do not work on a fully hot engine — oil at operating temperature can cause serious burns.
Safely raise and support the vehicle
Use a floor jack to raise the vehicle at the manufacturer's designated jack points (shown in your owner's manual), then lower it onto rated jack stands. Alternatively, drive slowly onto ramps. Confirm the vehicle is stable before sliding underneath — shake it gently to check.
Position the drain pan and remove the drain plug
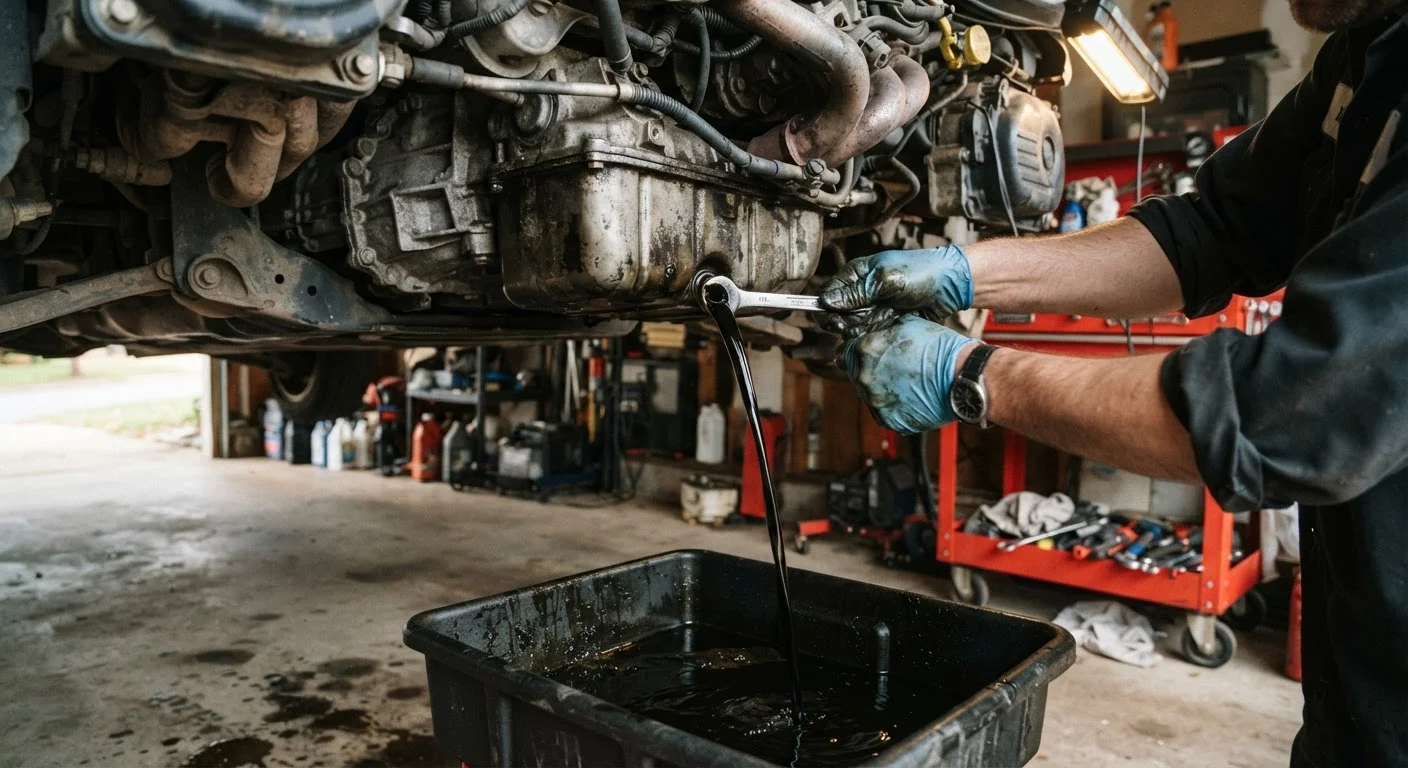
Locate the drain plug on the bottom of the oil pan — it's typically a large bolt near the lowest point of the engine. Slide your drain pan into position beneath it. Using the correct socket size, loosen the plug counterclockwise, then remove it by hand while keeping slight inward pressure so it doesn't shoot out when it comes free.
Remove the old oil filter
While the oil drains, use an oil filter wrench to loosen the filter. It will contain residual oil, so angle it carefully as you remove it. Have a rag handy. Check that the old filter's rubber O-ring comes off with it — a stuck old O-ring left on the engine is a common cause of oil leaks after a change.
Reinstall the drain plug and fit the new filter
Once the oil has fully drained, reinstall the drain plug — with a new washer if required — and tighten it to the torque value specified in your manual. Hand-tighten the new filter after applying a thin film of fresh oil to its rubber O-ring, then give it a three-quarter turn snug by hand. Do not use the filter wrench to tighten it.
Lower the vehicle and add fresh oil
Lower the vehicle back to level ground. Remove the oil filler cap on top of the engine and pour in the correct amount of new oil using a funnel. Start with slightly less than the listed capacity, then check the dipstick before adding more. Replace the filler cap securely.
Start the engine and inspect for leaks
Start the engine and let it idle for 30 seconds. The oil pressure warning light should go off within a few seconds. Shut it down, wait a minute, then check the dipstick and look under the vehicle for drips at the drain plug and filter. Address any leaks before driving.
Disposing of Old Oil and Resetting the Reminder
Used motor oil is a regulated waste material in every US state. It cannot be poured down a drain, into soil, or into household trash. Most auto parts retailers accept used oil for recycling at no charge — call ahead to confirm volume limits. Store the used oil in a sealed, leak-proof container (the empty oil bottles work well) until you can drop it off.
After refilling, many vehicles display an oil life percentage or a wrench icon on the dashboard. Resetting this indicator varies by make and model — your owner's manual will have the specific button sequence. On some vehicles, particularly newer models, the reset may require a scan tool. If you can't reset it yourself, a quick visit to a shop or dealership for that step alone is a reasonable option.
Finally, check your oil level with the dipstick after running the engine for about 30 seconds and shutting it off. Let it sit for a minute, then pull and read — the oil should fall between the min and max marks. Also check underneath for any drips around the drain plug or filter before moving the vehicle.
Drivers sometimes have misconceptions about how often oil actually needs changing. Our article on common car maintenance myths addresses the outdated 3,000-mile rule and other persistent beliefs worth reconsidering.